
|
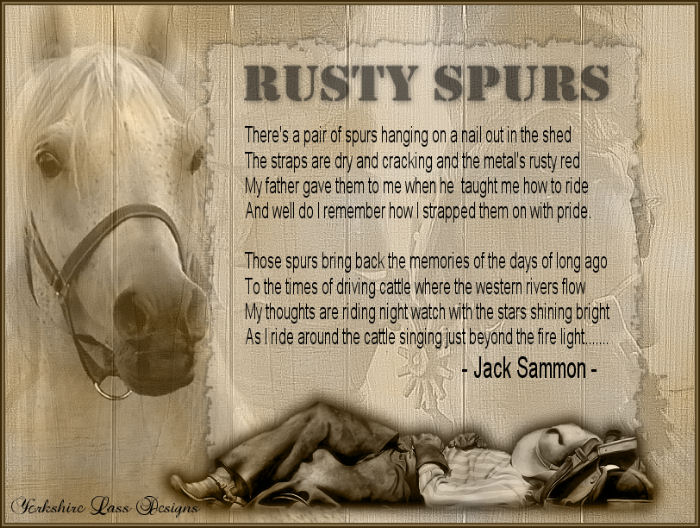
This tutorial is my own design and any resemblance to any other tutorial is purely coincidental It was created in Paint Shop Pro X Inspired by the poem entitled "Rusty Spurs" by Jack Sammon, an Australian bush poet. Read the full poem HERE © November 2012 - Yvonne - Yorkshire Lass Designs - All rights reserved. You will need the following to complete this tutorial: Tubes and Images boots-and-spurs.jpg Sorensen_Designs Mist April 109-11.psp 
yp_wordart_rusty_spurs.psp 1292663752_hommes_nikita.pspimage 
The above can be downloaded HERE Download and extract to a file on your computer. Open tubes in PSP and minimise. Plug Ins I.C.NET Software - Filters Unlimited Mura Meister - Clouds The above can be downloaded HERE Download and extract to your Plug Ins folder. *********** Drag this arrow with you to mark your place in the tutorial Drag and Drop Script from Dynamic Drive ********** INSTRUCTIONS STEP 1 Open a new canvas 800 x 600 pixels white background File >> New 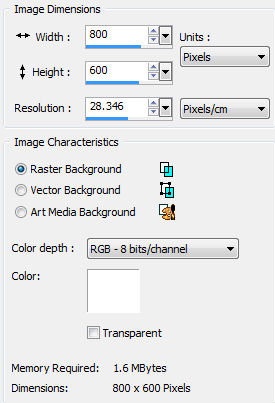
Layers >> Promote Background Layer STEP 2 In the Materials Palette load Foreground with #E8DFD0 and Background with #CAAE7D Effects >> Plug Ins >> Mura's Meister >> Cloud 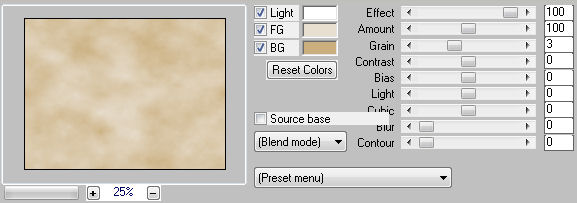
STEP 3 Layers >> New Raster Layer Selections >> Select All Maximise boots-and-spurs.jpg Edit >> Copy Minimise jpg Edit >> Paste into Selection Selections >> Select None Effects >> Edge Effects >> Enhance Effects >> Edge Effects >> Enhance More br> STEP 4 In the Layer Palette change Blend Mode to Luminance Legacy and reduce opacity to 55 Layers >> Properties 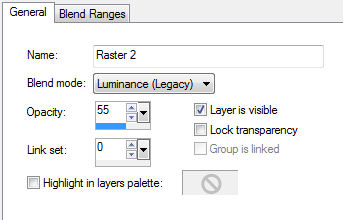
STEP 5 Maximise tube Sorensen_Designs Mist April 109-11.psp Edit >> Copy Minimise tube Edit >> Paste as New Layer With the Move Tool move tube across to the left STEP 6 In the Layer Palette change Blend Mode to Luminance Legacy and reduce opacity to 65 Layers >> Properties 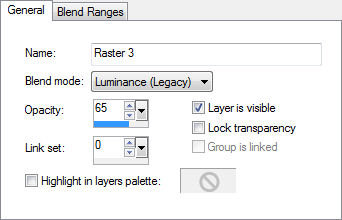
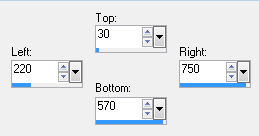
STEP 7 Layers >> New Raster Layer Selection Tool >> Custom Selection 
This is what you should have now 
STEP 8 Select Flood Fill Tool and flood fill selection with Foreground colour #E8DFD0 Do no de-select STEP 9 Effects >> Plug Ins >> I.C.NET Software >> Filters Unlimited Edges, Square >> Square Edge 04 
Selections >> Select None STEP 10 In the Layer Palette reduce opacity to 32 Layers >> properties 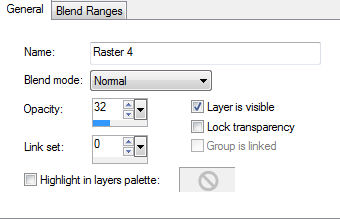
Effects >> 3D Effects >> Drop Shadow 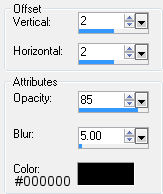
Repeat Drop Shadow changing the Vertical and Horizontal Offsets to minus 2 (-2) STEP 11 Maximise tube yp_wordart_rusty_spurs Edit >> Copy Minimise tube Edit >> Paste as New Layer With Move Tool centre on paper background and move up See finished image for placement STEP 12 Maximise tube 1292663752_hommes_nikita.pspimage Edit >> Copy Minimise tube Edit >> Paste as New Layer With the Move Tool position tube across the bottom of the paper background see finished image for placement In the Layer Palette change blend mode to Luminance (Legacy) 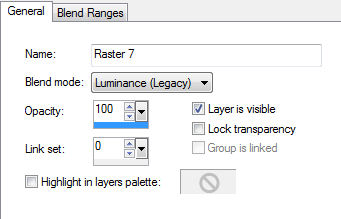
STEP 13 With the Selection Tool 
Draw a rectangle as below 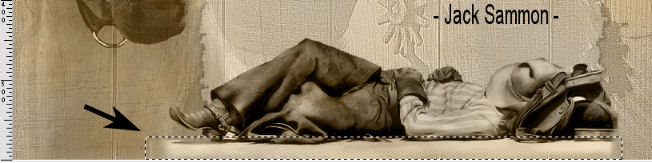
Hit Delete STEP 14 Effects >> Plug Ins >> Eye Candy 4000 >> Corona 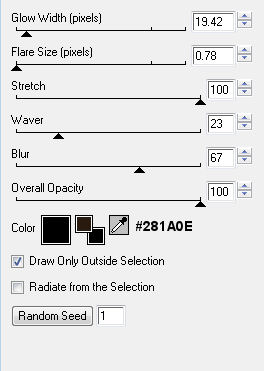
STEP 15 Layer >> New Raster Layer Add your name and/or watermark Layers >> Merge All (Flatten) STEP 16 Image >> Add Borders 
STEP 17 Image >> Add Borders 
STEP 18 Add border as in STEP 16 STEP 19 Resize if desired and save as a jpg I hope you enjoyed this tutorial. If you have any questions or would like to show me your result EMAIL ME Return to Tutorials - Page 1 |