|
BRINGING SEXY BACK

This tutorial is my own design and any resemblance to any other tutorial is purely coincidental.
© 2012 Yorkshire Lass Designs in PSP. All Rights Reserved.
It was created in Paint Shop Pro X, but can be realised in other versions.
However, some tool descriptions and locations may vary, but the overall result
should be the same.
You will also need Animation Shop.
My thanks to all the artists and other creators, known and unknown to me,
who have
inspired this tutorial and whose work I have used.
You will need the following to complete this tutorial:
Tubes
1Patries_VR371_Lauriecartoon-And a Two-3-5-11.psp
1Patries_VR373_And a OneLauriecartoon2_9-4-11.psp
1Patries_VR374-Lauriecartoon3and a three-10-5-11.psp
These three tubes were found here.
http://www.sitevanpatries.nl
I'm not sure how long the site will remain up,so I've included these
tubes in the supplies
yp_wall.psp
yp_wordart_sexy.psp
yp_wordart_months.psp
All the above can be downloaded HERE
Extract to a file on your computer, then open all tubes in PSP and minimise
**********
Drag this arrow with you to mark your place in the tutorial

**********
STEP 1
Open a new canvas 600 x 600 white
Layers >> Promote Background Layer
Layers >> New Raster Layer
Selections >> Select All
STEP 2
Maximise tube yp_wall.psp
Edit >> Copy
Minimise tube
Edit >> Paste >> Paste into Selection
Selections >> Select None
Adjust >> Hue and Saturation >> Colorize
Hue = 198/Saturation = 38
In the Layer Palette reduce opacity of Raster 2 to 40%
STEP 3
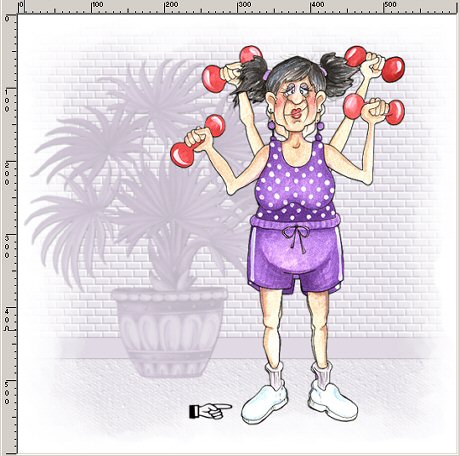
Maximise tube 1Patries_VR371_Lauriecartoon-And a Two-3-5-11.psp
Edit >> Copy
Minimise tube
Edit >> Paste >> Paste as New Layer
Image >> Resize 85% All layers unchecked
Adjust >> Sharpness >> Sharpen
Move to the right with Mover Tool
STEP 4
Maximise tube 1Patries_VR373_And a OneLauriecartoon2_9-4-11.psp
Edit >> Copy
Minimise tube
Edit >> Paste >> Paste as New Layer
Image >> Resize 85% All layers unchecked
Adjust >> Sharpness >> Sharpen
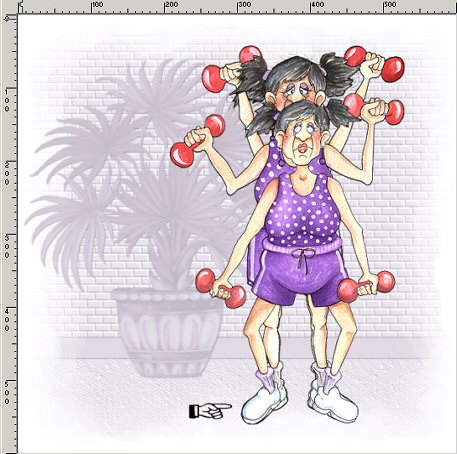
STEP 5
With the Move Tool position over the first tube so that the feet match
This is what you should have now
STEP 6
Maximise tube 1Patries_VR374-Lauriecartoon3and a three-10-5-11.psp
Edit >> Copy
Minimise tube
Edit >> Paste >> Paste as New Layer
Image >> Resize 75% All layers unchecked
Adjust >> Sharpness >> Sharpen
STEP 7
With the Move Tool position over the other tubes, once again matching the feet
This is what you should have now
STEP 8
Maximise tube yp_wordart_sexy.psp
Edit >> Copy
Minimise tube
Edit >> Paste as New Layer
With the Move Tool, re-position upper left of tag
See finished tag for placement
STEP 9
Maximise tube yp_wordart_months.psp
Edit >> Copy
Minimise tube
Edit >> Paste >> Paste as New Layer
With the Move Tool re-position bottom left of tag
See finished tag for placement.
STEP 10
Layer >> New Raster Layer
Add your name and/or watermark
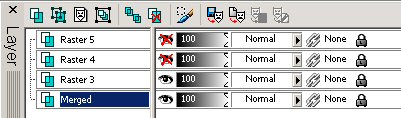
STEP 11
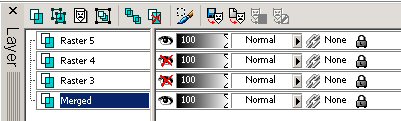
In the Layer Palette close all three tube layers
(Raster 3, Raster 4 and Raster 5)
Highlight Raster 8
Layers >> Merge >> Merge Visible
Layers >> Arrange >> Send to Bottom
STEP 12
In the Layer Palette make sure the Merged Layer is still highlighted
Selections >> Select All
Selections >> Modify >> Contract
Number of pixels = 5
Selections >> Invert
Flood fill the selection with Purple #713E95
Selections >> Select None
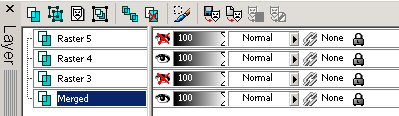
STEP 13
In the Layer Palette open all tube layers
STEP 14
NOW TO ANIMATE
In the Layer Palette close Raster 4 and Raster 5
STEP 15
The Merged Layer should be highlighted
Edit >> Copy Merged
STEP 16
File >> Jasc Software Products >> Launch Animation Shop
STEP 17
In Animation Shop (AS)
Edit >> Paste >> As New Animation
STEP 18
Back to PSP
In the Layer Palette close Raster 3, Open Raster 4
Edit >> Copy Merged
STEP 19
Back to AS
Edit >> Paste >>After Current Frame
STEP 20
Back to PSP
In the Layer Palette close Raster 4 open Raster 5
Edit >> Copy Merged
STEP 21
Back to AS
Edit >> Paste >> After Current Frame
STEP 22
Staying in AS
Edit >> Select All
Edit >> Copy
Paste >> As New Animation
STEP 23
Working on the 3 frames just created
Edit >> Select All
Animation >> Reverse Frames
Edit >> Select All
Edit >> Copy
STEP 24
Activate original 3 frames
Left click on frame 3 to select
Edit >> Paste After Current Frame
You should now have a total of six frames
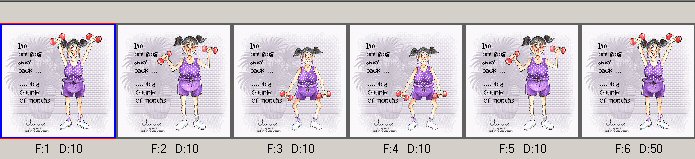
STEP 25
Give your animation a test run
View >> Animation
STEP 26
The animation is running a little fast, so we need
to slow it down
Animation >> Frame Properties
change the Display Time to 50
STEP 27
Animation >> Resize Animation
Resize Pixels checked
width = 450, height=450
Save as a gif and we're done
I hope you enjoyed this tutorial!
If you have any questions or would just like to show me your result
EMAIL ME
|